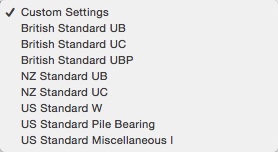
If you are using Objective and the built in Steel Library – remember to check the Presets…
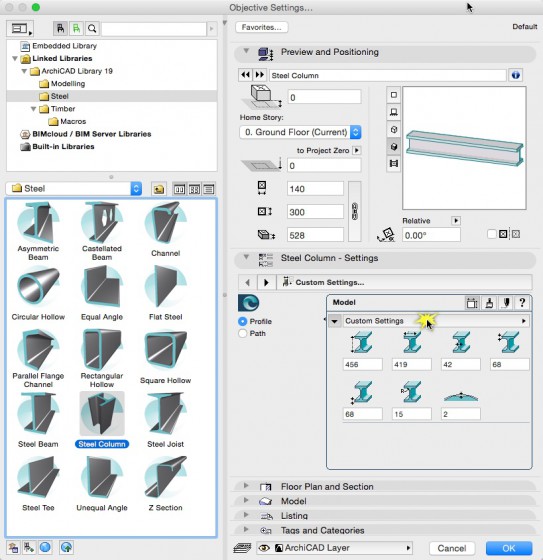
The content varies as each component has different attributes – but here is an example from the Steel Column:
If you are using Objective and the built in Steel Library – remember to check the Presets…
The content varies as each component has different attributes – but here is an example from the Steel Column:
When it comes to drawing walls, it is very common to need to Flip Wall on Reference Line… rather than use a button on a Toolbar – use the single key shortcut: P
Click the images below to see an example of this using ONLY P to change the wall position…
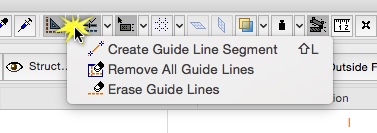
If you find you have too many Guide Lines and want to clear your workspace – click on the Pull Down next to Guide Lines on the Standard Toolbar and select Remove All Guide Lines…
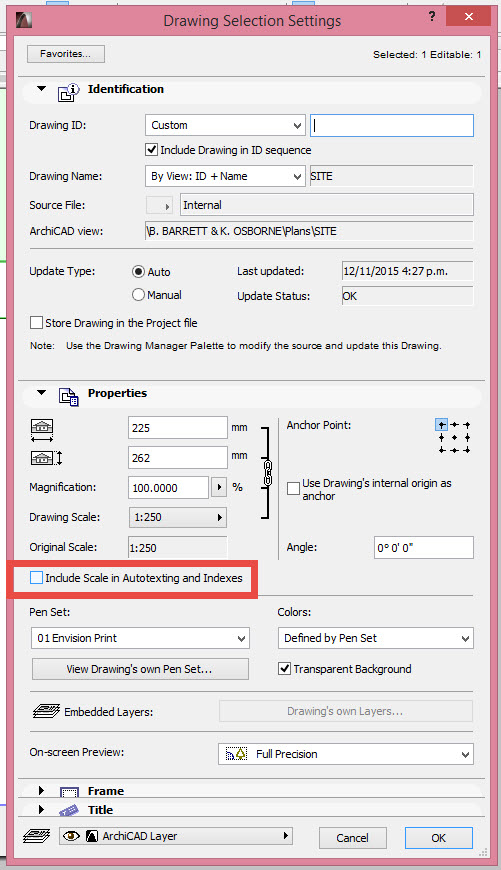
If you want to include or exclude the scale of a drawing in the Layout autotext for Scale
You can select the Settings of the drawing and go to Include Scale in Auto Text Indexes.
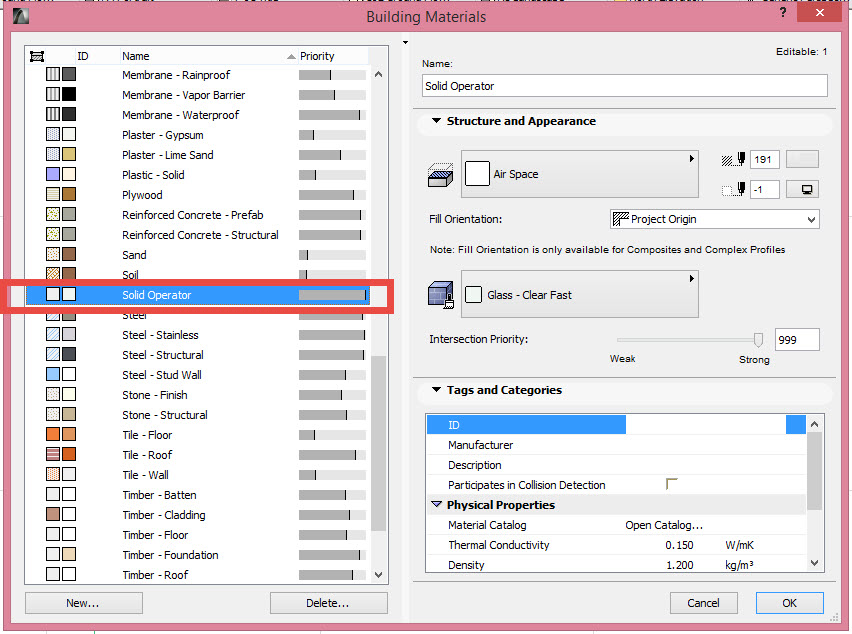
If you are creating an element or morph and using it as a Solid Element Operator, remember that there is a Building Material that has a high priority that will ensure that will be higher than any other material
With added features to the label tool in ARCHICAD 19, moving the label has changed.
Click on the text box handles will only move / edit text box and leave the arrowhead in its place.

To move the text and the arrowhead, click on one of 3 points:

When you place a DWG or DXF as a Linked Drawing (from File> External Content> Place External Drawing…) you can control the visibility of its layers.
Select the Embedded Drawing and go to its settings:
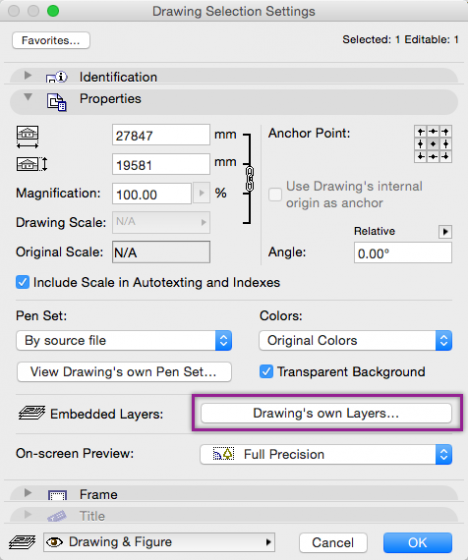
In the Properties Panel, click on Drawing’s own Layers to switch layers on or off.
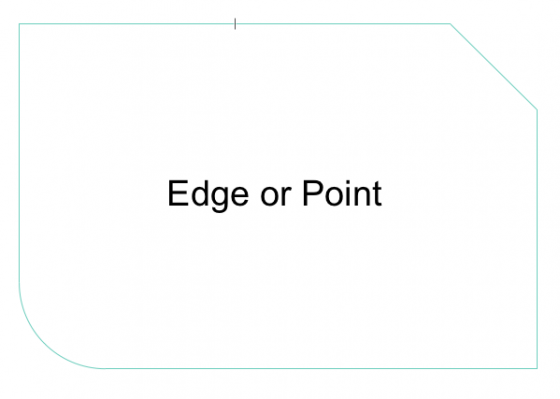
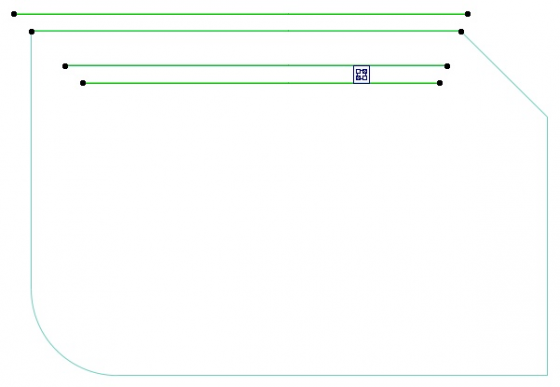
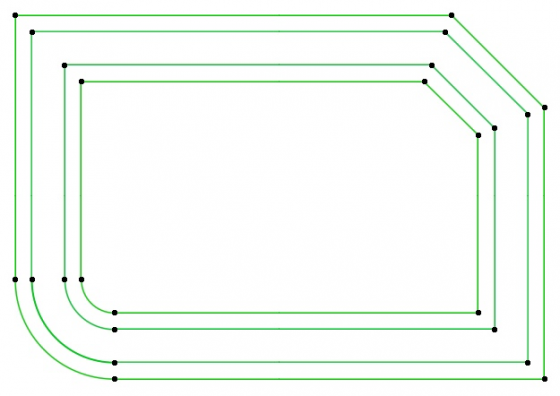
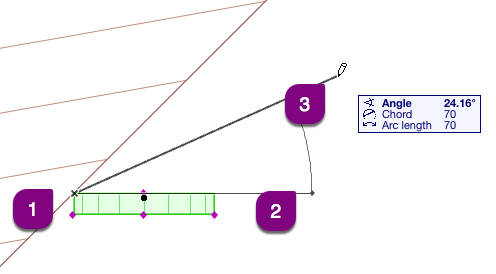
When placing a Slab Edge with Objective, it is important to pick the correct placement – depending on where you click on a Slab edge (edge or point), you will get different results.
Picking on an edge creates the Slab Edge on only that one edge of slab:
Picking on an point creates the Slab Edge on the entire perimeter of the Slab:
When creating models, you occasionally come up against problems such as this:
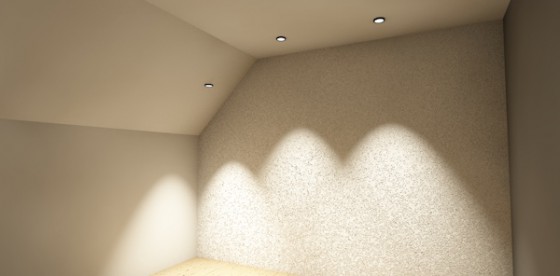
Here we have three recessed ceiling spot lamps – but the ceiling is not horizontal and there is no way to rotate the third lamp in the angled ceiling… unless you use Cadimage Objective.
Create a section through the model so you can see the Lamp that needs to be rotated and select it.
Go to Objective> Tools> Rotate…
The process is very similar to the standard ARCHICAD rotate – except we are rotating in the section view.
Once completed you can see the transformation:
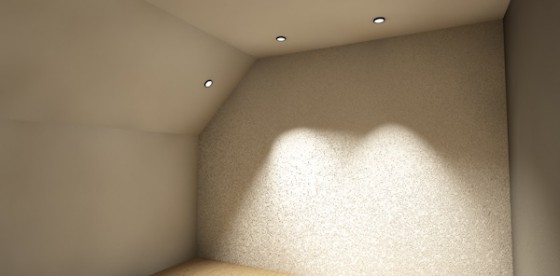
Please note: the Lamp remains fully parametric after the rotation
When Migrating a project from version to version, it is important to remember to Migrate the Libraries too.
When you first open a Project in a new version, the following dialog will appear…

All you need to do is hit the Migrate button… but what happens if you hit Skip? The project will likely open as normal – but if you try to use Cadimage Tools for example, you will encounter some problems. This is because the Project will be in the latest version – but will continue to use the old Library.
If you have skipped on the first dialog – don’t worry, it can easily be fixed by going to File> Libraries and Objects> Library Manager… and clicking the Migrate Libraries button highlighted below:

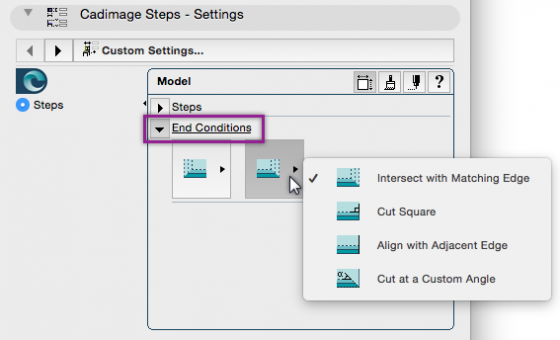
When you place a Slab Edge on just one edge of a Slab, the End Conditions can be adjusted to suit your requirements.
Select the place Slab Edge and go to Settings then End Conditions to pick what happens at each end:
Quick Options Palette now with Settings Shortcuts in V19.
Layer Settings, Scale, Partial Structure Display, Pens and Colors, Model View Options, Renovation Filter Options and Project preferences can now be accessed faster than ever.
GRAPHISOFT have released the Add-in for Revit 2016…
“The GRAPHISOFT ARCHICAD Connection is a free Add-In for Autodesk Revit softwares (including Revit Structure, Revit MEP and Revit Architecture). The Add-In improves the IFC model-based and bi-directional data exchange between GRAPHISOFT ARCHICAD and Autodesk Revit applications.”
For further information, please see this page: http://www.graphisoft.com/downloads/interoperability.html
To edit the content of a Keynote (Key, Title, Spec or Description), select the Keynote you want to change and edit the fields in Keynote Editing shown below:
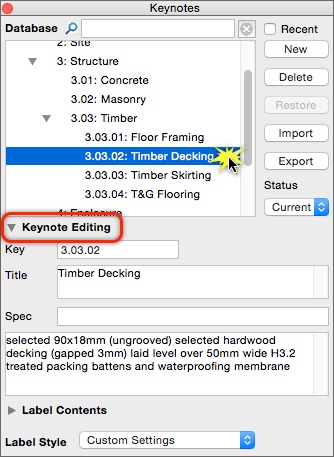
Any changes made to the fields are automatically saved to the database. However, if any of the keynotes have already been placed as Labels, you will need to run the Cadimage> Keynotes> Audit Labels… tool to ensure all Labels are updated with the latest data.
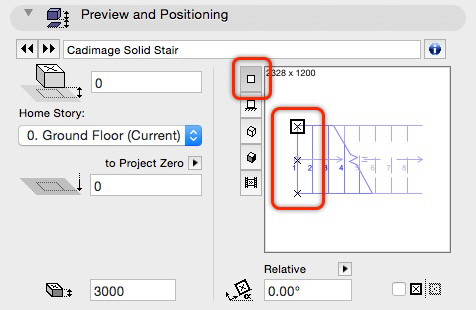
To set the Alignment of Stairs (Left, Right or Centre), use the Preview and Positioning Panel to pick on the appropriate hotspot:
Avoid a situation like this with Wall Coverings in ARCHICAD:
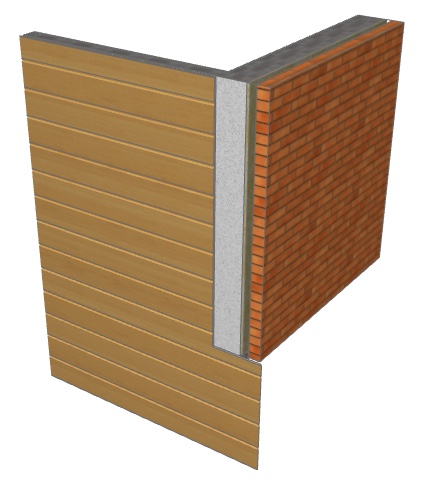
In Layout> Ignore Shape Detail near Ends you can set a distance where the Covering can ignore the shape detail of the model:

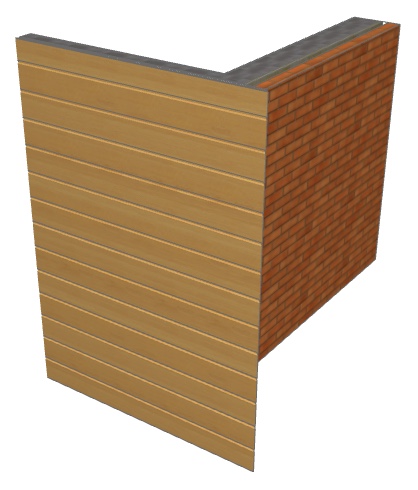
This was introduced following ARCHICAD 17 to allow the control of the connection as walls now clash rather than mitre.
By setting the values to be the same as the connecting wall thickness, the result is as follows:
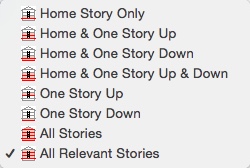
To control the display of the Stair on Plan View, create a new Polystair or select an existing one and go to its settings. Navigate to the Floor Plan and Section Panel then FLOOR PLAN DISPLAY> Show on Stories as highlighted below:

The default option should be All Relevant Stories but it may be one of the following:
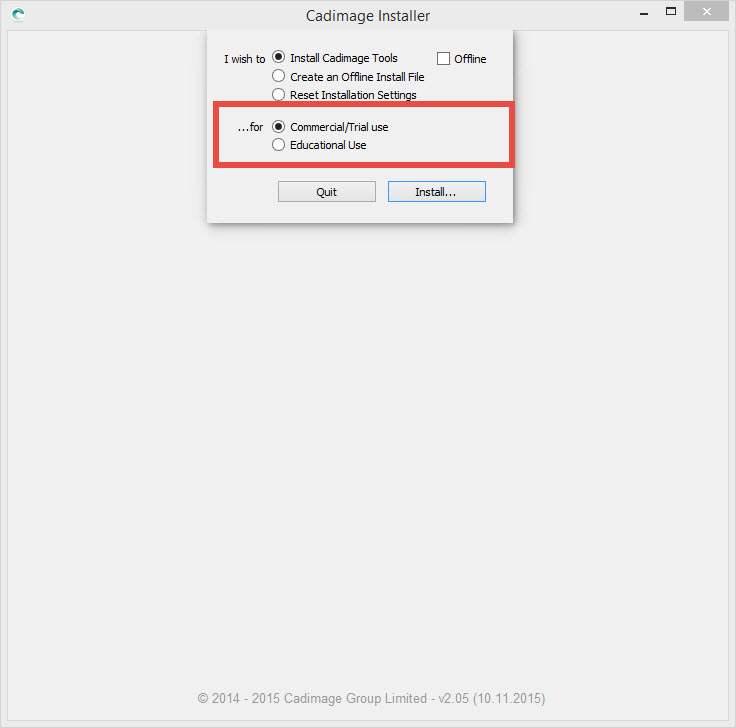
If you are running an EDU license of ArchiCAD 18 o 19 you can download and install the tools from our website mycadimage.com
Just download the Installer for the tools and when you run it you will find the Education and the Trial install options.
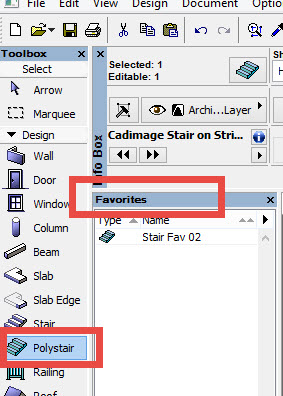
Since the PolyStair tool was released for ARCHICAD 18 the use of Favorites has changed.
The tool doesn’t save the PolyStair as a standard AC Stair anymore, therefore the only way to get a Favorite is using the same PolyStair Icon in the Toolbox
As you can see in the sequence below, saving a selection as a Favorite for the PolyStair will require to place any polystair shape and then double click the Favorite from the palette so the favourited stair is applied.
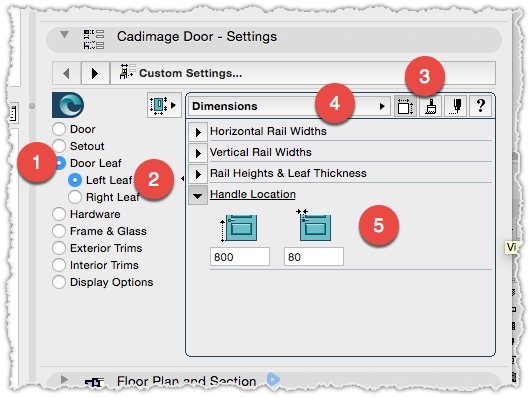
Its easy to choose the Door Handle style from the pullout list, but the actual position of the Handle is not in the same tab, just go to Door Leaf > Left Dimensions or Door Leaf , click the Style button and select the Dimension